
VCH 5730 HANDSTAUBSAUGER WET DRY - Hand vacuum cleaner GRUNDIG - Free user manual and instructions
Find the device manual for free VCH 5730 HANDSTAUBSAUGER WET DRY GRUNDIG in PDF.
User questions about VCH 5730 HANDSTAUBSAUGER WET DRY GRUNDIG
0 question about this device. Answer the ones you know or ask your own.
Ask a new question about this device
Download the instructions for your Hand vacuum cleaner in PDF format for free! Find your manual VCH 5730 HANDSTAUBSAUGER WET DRY - GRUNDIG and take your electronic device back in hand. On this page are published all the documents necessary for the use of your device. VCH 5730 HANDSTAUBSAUGER WET DRY by GRUNDIG.
USER MANUAL VCH 5730 HANDSTAUBSAUGER WET DRY GRUNDIG
HANDHELD VACUUM CLEANER WET & DRY
VCH 5730
Please note the following instructions when using the appliance.
■ The appliance is designed for domestic use only. Claims on the guarantee are not valid if the appliance is used for industrial or commercial purposes.
- Observe these instructions in order to prevent damage to the appliance or danger arising from improper use. Keep them in a safe place.
- Keep the appliance and the accessories away from eyes and ears while operating.
This appliance is designed for vacuuming dirt, dust particles and liquids. Do not attempt to use it on large objects which could block the appliance and damage it.
- Do not use it on cigarette stubs, ash from a fireplace or matches. This could cause a fire.
- Do not use it on any flammable or acidic liquids.
■ Never operate the appliance without the dust container and filter.
■ Clean the filter regularly.
Do not use the appliance if the air duct and the ventilation slot are blocked. Always keep the air ducts and ventilation slot free of dirt, hair and any other elements which could obstruct or block the air flow.
■ Never use the appliance if it is visibly damaged. This also applies if the appliance has become accidentally wet. Please contact your specialist dealer if this is the case.
■ Only use the power supply unit supplied to charge the appliance.
- Keep the appliance away from children.
■ Only store the appliance in a dry, safe place.
■ Do not open the appliance under any circumstances. No warranty claims are accepted for damage caused by incorrect handling.
Dear customer,
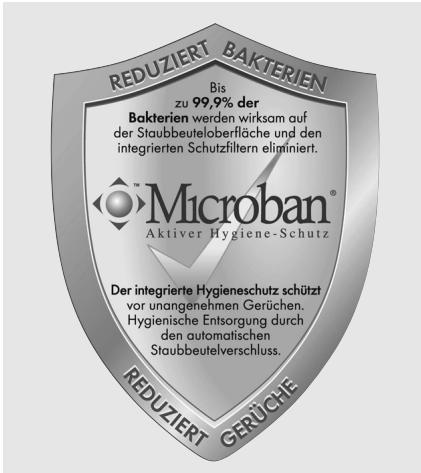
We hope you enjoy using your new GRUNDIG handheld vacuum cleaner with its built-in Microban® hygiene protection.
Special features
- Upholstery brush for cleaning skirting boards, fabric surfaces such as upholstery and pieces of furniture, for example picture frames.
- Crevice nozzle for parts that are difficult to reach.
- Attachment for wet operation.
- Microban® hygiene protection.
What is Microban®?
Microban ^® is odourless, tasteless and colourless.
Microban ^® inhibits the growth of microorganisms by permeating the cell walls and destroying the micro-organisms. These cells are then no longer able to reproduce and growth is prohibited.
Grundig offers an effective way to clean floors hygienically with the impressive technology from Microban®. The Grundig dust filter is equipped with the integrated Microban® hygiene protection. This even inhibits the spread of tiny microscopic particles including house mites, pollen and dust.
Dangerous bacteria can hardly survive with the integrated Microban® hygiene protection.
Microban® technology has been tested in independent laboratories and certified, thus making a significant contribution towards a healthier household.
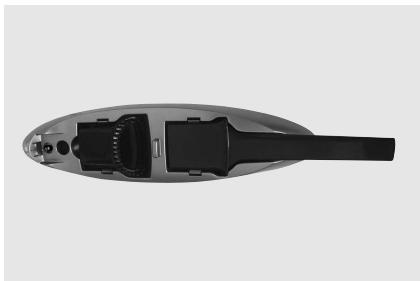
Controls and individual parts
Unfold page 2 so that you have the illustration in front of you.
A Switch for turning on and off.
B Button to open the dust container.
C Dust container.
D Filter (inside the dust container).
E Suction intake.
F Engine housing.
G Charging display (LED).
H Handle.
Accessories
I Charging unit for wall mounting with power supply unit (see page 13).
J Microban® hygiene protection replacement filter.
K Crevice nozzle.
L Upholstery brush.
M Attachment for wet operation.
Your appliance is supplied with three attachments: The crevice nozzle, the upholstery brush and the attachment for wet operation.
The parts can be stored in the charging unit.
natural_image
Top-down view of a handheld vacuum cleaner device with internal components (no visible text or symbols)Crevice nozzle
Use the crevice nozzle K for cleaning crevices and corners that are difficult to reach (such as PC keyboard).
1 Switch off the appliance.
2 Press the crevice nozzle firmly into the suction intake E of the appliance.
natural_image
Close-up of a black hairdryer with a handle and arrow indicating compression (no text or symbols)Upholstery brush
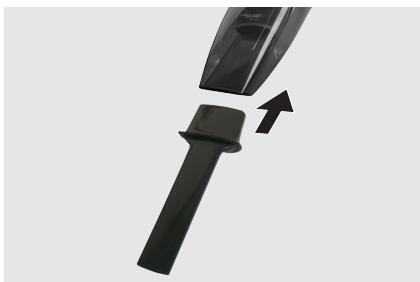
Use the upholstery brush L for cleaning skirting boards, fabric surfaces such as upholstery and pieces of furniture for example, picture frames.
1 Switch off the appliance.
2 Press the upholstery brush firmly into the suction intake E of the appliance.

natural_image
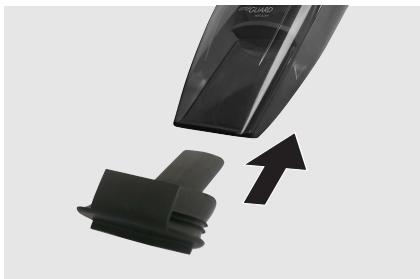
Close-up of a black vacuum cleaner with a textured base and an upward arrow indicating motion (no text or symbols visible)Attachment for wet operation
Use the attachment M for cleaning wet surfaces. Hold the appliance in an upright position and pull it towards you. The rubber lip must be positioned behind the liquid.
1 Switch off the appliance.
2 Press the attachment firmly into the suction intake of the E appliance.
natural_image
Close-up of a black vacuum cleaner with a black plastic clip and an upward arrow indicating motion (no text or symbols visible)Note
■ Always empty the dust container after use to prevent any unpleasant odours.
Charging unit for wall mounting
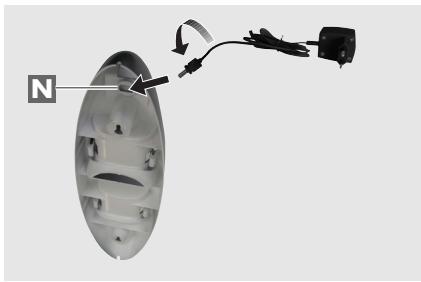
Attach the charging unit 1 to the wall.
Caution
- Do not mount the charging unit close to a heating unit or in direct sunlight. Do not mount the charging unit outside.
■ Make sure the place you select for mounting is free of any concealed electrical wiring and water or gas pipes.
1 Select a place near a socket (230 V, 50 Hz) for connecting to the power supply unit.
2 Select an appropriate drill for the screws and wall plugs supplied.
3 Drill two holes approx. 30 cm above the floor, insert the wall plugs and screw in the screws.
4 Plug the power supply unit into the N charging unit and rotate it by 90°.
5 Hang the charging unit on the screws.
natural_image
Diagram of a lampshade with a black cable and attached power outlet, showing internal components (no text or symbols)Charging
Check to see whether the type plate on the power supply unit corresponds to your local mains supply.
1 Press the A button to switch off the device.
2 Fit the appliance exactly into the charging unit 1.

natural_image
Exploded view diagram of a hair dryer showing internal components and adjustment arrows (no text or labels)3 Plug the power supply unit into the socket.
- Charging begins, the charge indicator lights up red.
- The charge indicator lights up until the appliance is removed from the charging unit or the power supply unit is disconnected.
Notes
- Charge up the batteries completely (14 hours) before you first use them or if you have not used them for a long time.
- Charge the appliance at room temperature. Low or high temperatures will affect the service life of the battery.
■ The ambient temperature should be between 5 °C and 40 °C.
■ The operating time is approx. 18 minutes after it has been charged.
■ The power supply unit heats up while it is charging. This is normal.
■ Always place the appliance back in the charging unit 1 after use. The batteries will be recharged and the appliance is ready to use at all times. If you do not intend to use the appliance for a long time (for example two weeks), disconnect the power supply unit from the socket.
Switching on and off and using
1 Remove the appliance from the charging unit I.
2 Depending on the type of cleaning, insert one of the three attachments into the suction intake E.
3 Push the A switch forwards to switch on the appliance.
4 Push the A switch backwards to switch off the appliance.
5 Remove the attachment.
6 Fit the appliance exactly into the charging unit 1.
Emptying and cleaning the dust container
1 Hold the appliance upright with the suction intake E facing downwards.
2 Press the B button and remove the dust container downwards.
3 Remove the holder and filter D from the dust container.
Notes
■ Wash the filter with warm soapy water occasionally. After washing, leave it to dry completely. Use the spare filter in this case.
4 Empty the dust container C, wash it and leave it to dry.
Note
■ Leave the dust container to dry completely before you put it back again.
5 Hold the appliance upright.
6 Press the B button and put the C dust container back in.
7 Release the button C.
- The catch must latch in.
Cleaning and care
- Do not clean the appliance with chemical cleaning agents. This could damage the housing.
■ Only clean the appliance with a damp cloth and a mild detergent.
■ Brush out the filter over a dustbin.
■ Wash the filter and the inside of the dust container with warm soapy water. Do not wash the filter in the washing machine.
■ The filter and dust container must be completely dry before they are used again.
Replacing the battery
The battery may only be replaced by an authorised technician.
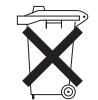
Environmental note
This product has been made from high-quality parts and materials which can be re-used and recycled.
Therefore, do not throw the product away with normal household waste at the end of its service life. Take it to a collection point for recycling electrical and electronic devices. This is indicated by this symbol on the product, in the operating manual and on the packaging.
Please find out about collection points operated by your local authority.
Help protect the environment by recycling used products.
Technical data

This product fulfils the European directives 2004/108/EC and 2006/95/EC.
Serial number
GMM 1300
Power supply
230V\~, 50 Hz, at the socket DC 9 V at the charging unit Rechargeable battery: Nickel metal hydride
Protection class
III

Ni-MH

Technical and design modifications reserved.
Grundig Multimedia B.V.
Atrium, Strawinskylaan 3105 • NL-1077 ZX Amsterdam • http://www.grundig.com